|
Orologio/SuperClock
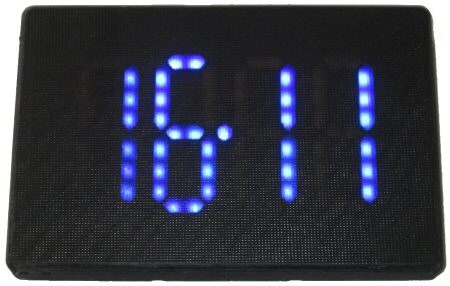
A really nice wall clock, Italian style, that will not only show the exact time and temperature, but also sentences, and can be used with automation / home assistant, with MQTT HTTP WiFi
(versions: V5, BAT, SOUND, TXTR, I, E) available [get it now - below]
|


|
Quick manual for Orologio/SuperClock
A.TO CONNECT AND SET THE TIME / DATE
1) connect to WiFi wfeasy.com - on some mobile phones it may be necessary to confirm the connection ("this connection has no Internet, etc. etc.") and / or disconnect the data connection because in some cases it penalizes performance; after the first configuration you can also connect via your own WiFi / an existing WiFi, see point D.
2) connect with the browser (Safari, Chrome, Firefox, etc.) to the wfeasy.com site - if you find it convenient here is the QR:

3) a login page is shown, asking for a password, the standard one is pippo - enter it and click OK. Then the main page is shown:

The clock starts by default at 11.00; clicking "Save" sets the current time as the time / date (obtained from PC / Mac / Smartphone).
As you can see there is a box where you can enter any text, by clicking "Sentence / Scroll" the clock works as a display showing the scrolling text. Clicking "Clock" returns it to clock mode.
You will need to enter the Channel / Sensor number if you have an external TXtemp temperature sensor - it must obviously be the same channel set inside the TXtemp. The TXtemp RF version lists the RF channels as well as the WiFi channels (the TXtemp RF usually works at a greater distance and consumes less and less); if you don't have a TXtemp you can leave it at 0 or OFF.
B. DEFINE WHAT IS SHOWN (INTERNAL / EXTERNAL TEMPERATURE, DATE, ETC)
1) connect etc. as in point A
2) go down and click the link "in addition to the time show ..."; a window appears where all the things that can be shown are listed, alternating them, and the time in seconds for which they must be displayed:

If you choose things that are not there or are not turned on / activated it will show blank space or "-".
C. SET ALARMS / SCROLLING WRITINGS AT A CERTAIN TIME / DATE / WEEKLY / ETC
1) connect etc. as in point A
2) at the bottom of the page, click the link "Alarm / Periodic actions", a page will appear where you can add new alarms / actions that are stored. A red cross is shown next to the stored ones that can be used to delete them.
D. CHANGE THE PASSWORD AND DEFINE THE VARIOUS OPTIONS (EX. CONNECTION TO HOME WiFi)
1) connect etc. as in point A (at wfeasy.com/wfeasy.com)
2) at the bottom of the main page, choose the link "Settings"
3) the settings page will appear; immediately under the language, you can insert one or more WiFi to which you can connect; for example. the WiFi at home (or office or whatever); select your WiFi from the list (if it is not there, use the circular button that makes it repeat the search for the WiFi available), enter the password, click "+ + +" (sometimes it disconnects here; just reconnect)

4) below you can define the operating parameters:

For parameters:
- "Name" is the name you give to the watch (to distinguish it in case you have several);
- "Password" is the access password (in the image the standard ones; change it);
- "Brightness" if the automatic brightness variation is OFF, this is the chosen brightness (in the example 100, about 1/5); if the automatic variation is activated, this is the brightness that will be automatically provided in the conditions of full light;
- "automatically varies brightness" if it is not OFF, the internal sensor is activated and you can choose one of the settings and have a clock that automatically becomes brighter if there is a lot of light, and automatically decreases the brightness in the evening / at night;
- "TXtemp timeout" for those who have the TXtemp, defines the validity time of the external temperature; for example if you set the TXtemp to transmit the temperature every 15 minutes, here it is okay to put 16 minutes (or 31 to be conservative)
- "Temperature" you can choose whether to use ° C or ° F;
- "Offset T" "Offset T (ext)" depending on where the clock or the external temperature sensor is placed, it may happen that they reveal a few degrees more or less than the average temperature that is actually there: here the can be "fixed"
- "Synchronize with atomic clock" activates clock synchronization with a group of atomic clocks - using your WiFi connection to reach them (WiFi connection must be set up).
E. ACCESS YOUR SUPERCLOCK WITH HOME / OFFICE / ETC WIFI.
1) connect etc. as in point A at wfeasy.com/wfeasy.com
2) make sure that you have entered the WiFi parameters as in point D, and that you have memorized / connected them
3) if it is connected to vs. WiFi, at the bottom of the window, will indicate the name of the WiFi and the IP it assumes, eg. 192.168.1.14
4) with the PC / Mac / phone or whatever is connected to the home WiFi at this point
5) click the link if the page is still there, or type the number on the browser bar, all attached with all the dots that separate it, without spaces, for example 192.168.1.14 or http://192.168.1.14
F. PILOT IT WITH HTTP OR MQTT FROM AUTOMATION, HOME AUTOMATION, HOME ASSISTANT, ETC.
To list all the options it takes a moment, so for this we have made a special page with the list of Topics and the table of commands, click here for the HTTP and MQTT manual for SuperClock...
|